Cloudtrail logs provide excellent insight into how your AWS account is being used. They record all activity by the web console, SDKs, and APIs. With help from the AWS plugin, getting this information into Graylog is easier than ever. In this blog post you’ll set up the required AWS resources, configure the Graylog input, and do some basic searches to explore its capabilities.
A Brief Technical Overview
There are three AWS resources that work together to get Cloudtrail messages into Graylog. These are an S3 bucket, an SNS topic, and an SQS queue. The S3 bucket stores the actual Cloudtrail messages. This is configured whether you are using the Graylog input or not. Optionally (but required for the Graylog input) Cloudtrail can be configured to send a notification through SNS when new Cloudtrail messages are added to the bucket. The queue is subscribed to the SNS topic so that a message is added every time a notification is sent. The input plugin will then pop messages from the queue, read the corresponding S3 object, and put the information into Graylog.
Getting Started
The first step is to enable Cloudtrail in your AWS account if you haven’t already. Head to the Cloudtrail console page and click ‘Create trail’.
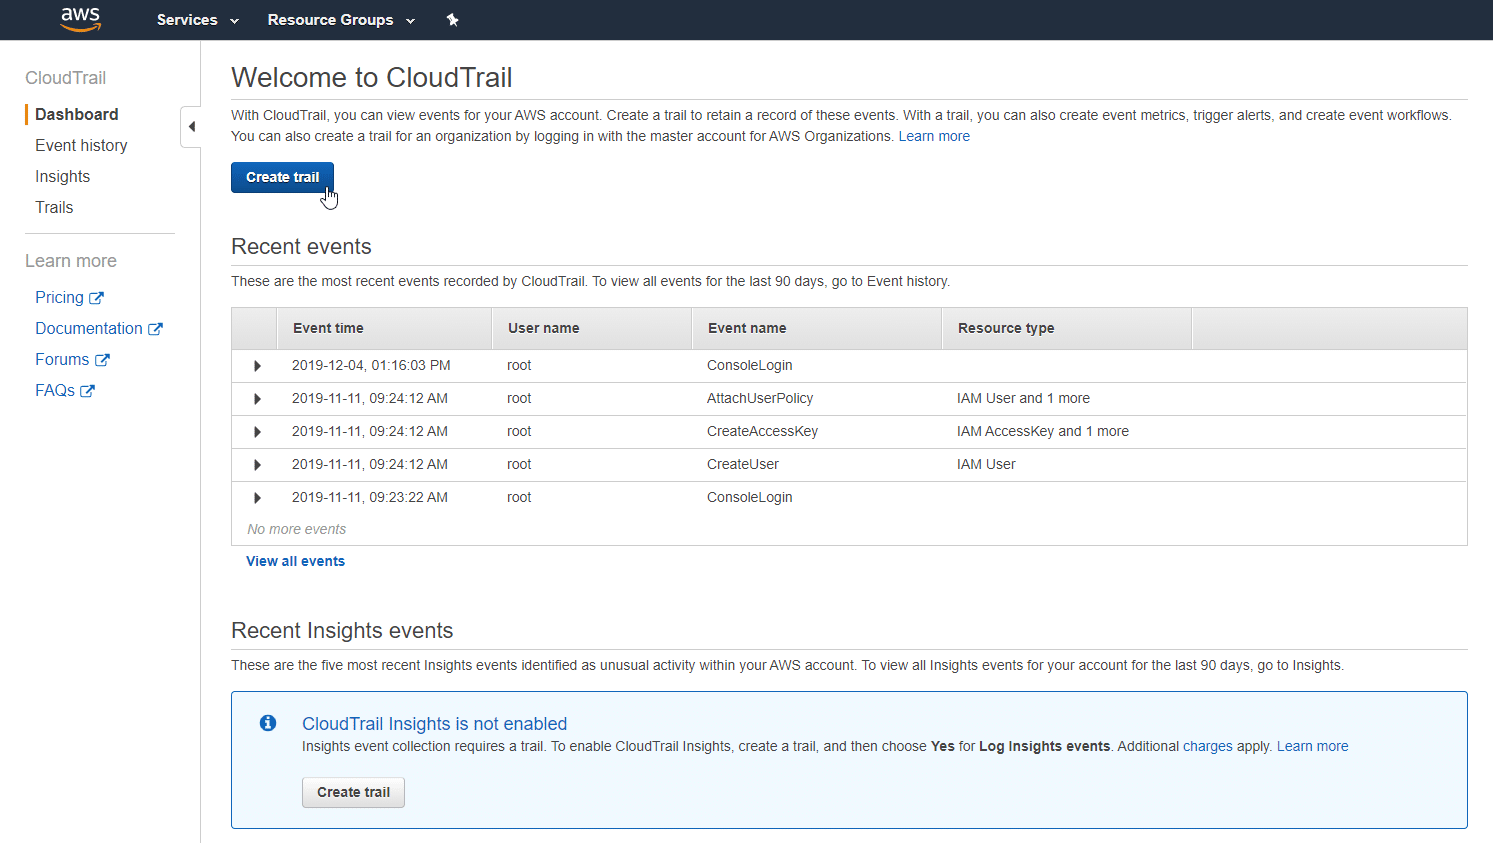
Give the trail a name. If you’d like visibility into activity across your entire AWS account make sure ‘Apply trail to all regions’ is checked. Next, scroll down to the ‘Storage location’ header.

Configure Cloudtrail
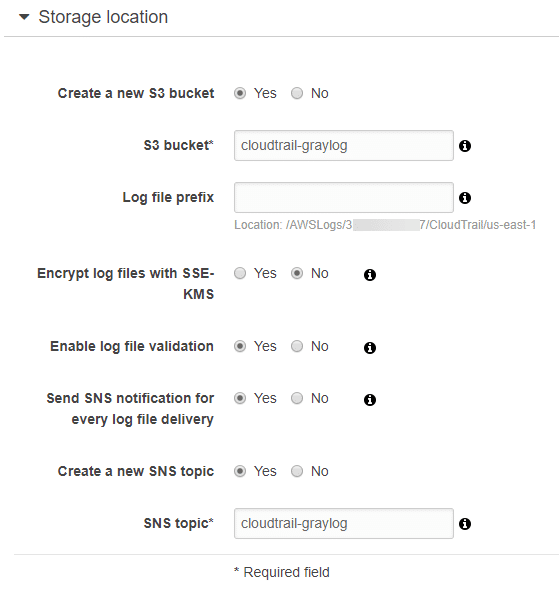
An S3 bucket is the primary storage mechanism for Cloudtrail records. Create a new bucket and make note of the name. Also select ‘Send SNS notification for every log file delivery’ and make a new SNS topic. Finally, hit ‘Create’ to finalize the configuration.
Create an SQS Queue
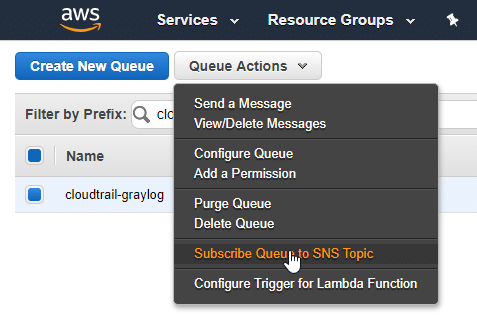
The SQS queue is the final service you need to configure. Visit the SQS console page and click ‘Get Started Now’ if you haven’t created a queue before. Give the queue a name and leave the default Standard type. When the queue is created, subscribe it to the SNS topic you created.
Make an IAM User
Next you need to give Graylog some permissions. This will allow the input to read from the S3 bucket and SQS queue. Create a user with programmatic access and make not of the access key ID and secret key. Create a new policy for each of the following JSON blocks and attach it to the user.
Read S3 Bucket
This policy is used to read Cloudtrail records for the S3 bucket. Make sure to replace the bucket name.
“`json
{
“Version”: “2012-10-17”,
“Statement”: [
{
“Sid”: “Stmt1411854479000”,
“Effect”: “Allow”,
“Action”: [
“s3:GetObject”
],
“Resource”: [
“arn:aws:s3:::<bucket-name>/*”</bucket-name>
]
}
]
}
“`
Read SQS Queue
This policy is used to pop items from the queue. Make sure to replace the ARN.
“`json
{
“Version”: “2012-10-17”,
“Statement”: [
{
“Sid”: “Stmt1411834838000”,
“Effect”: “Allow”,
“Action”: [
“sqs:DeleteMessage”,
“sqs:ReceiveMessage”
],
“Resource”: [
“<sqs-queue-arn>”</sqs-queue-arn>
]
}
]
}
“`
Configure Graylog
Let’s configure Graylog now.
Install the Plugin
Note: If running a version of Graylog greater than 2.4.0 the plugin is included by default and this step can be disregarded.
Download the plugin from the GitHub releases page and place the `.jar` file in the `plugins/` directory located in the `graylog-server` directory. Restart the `graylog-server` service.
Create the Input
Create a new input of type ‘AWS CloudTrail Input’ and complete all required items. This includes the IAM user credentials, S3 bucket name, and SQS queue name. After a few minutes, messages will start to be received.
Troubleshooting
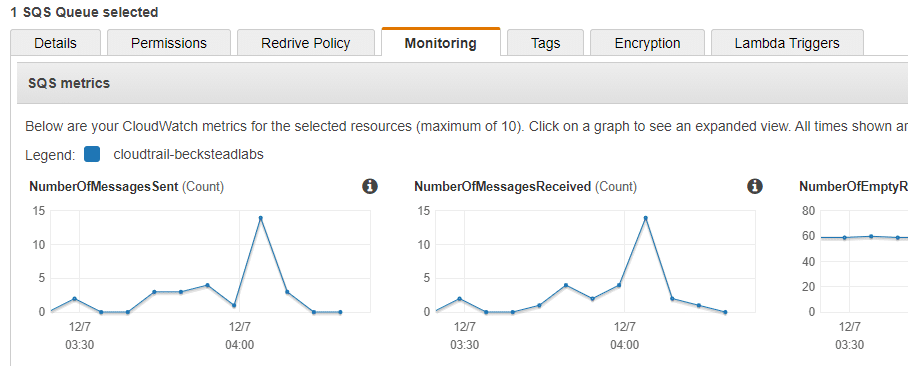
If messages are not appearing in Graylog, check the monitoring graphs on the SQS page to make sure your queue is properly subscribed to the SNS topic.
Try It Out
All processed logs can be displayed using the query `source:aws-cloudtrail`. After checking out the messages you can see each contains the corresponding AWS service, the action taken, and the IAM user who initiated the action as well as a plethora of other fields. Try a few example searches.
To see EC2 instance creation search `source:aws-cloudtrail AND event_source:ec2.amazonaws.com AND event_name:RunInstances`.
To view console logins use the search `source:aws-cloudtrail AND event_source:signin.amazonaws.com AND event_name:ConsoleLogin`.
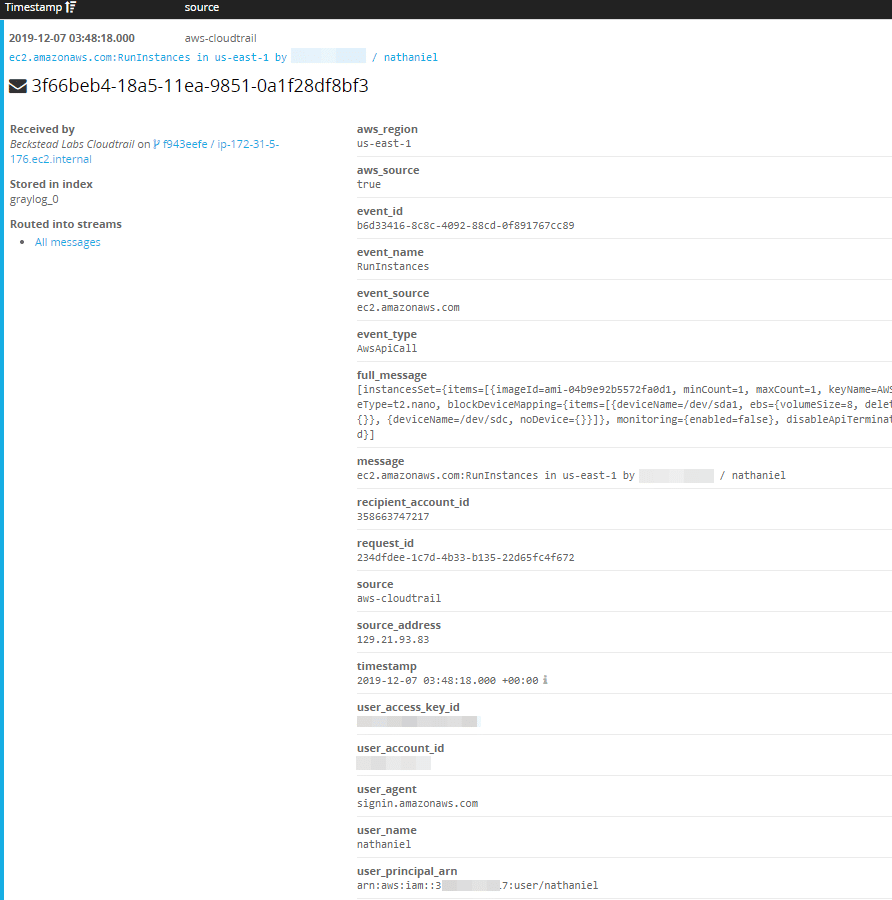
Now keeping tabs on your AWS environment is a little simpler. For more information check out the AWS plugin GitHub repository.
This article has been written by the guest post author Nathaniel Beckstead. Thanks Nathaniel for your contribution! To submit your guest posts to Graylog, feel free to contact us byjoining our community or sending an email to[email protected].
The Author

Nathaniel Beckstead is a soon-to-be graduate of Rochester Institute of Technology’s computing security program. He enjoys exploring the latest trends in cloud security and creating cool tools for incident reponse and threat hunting.


