In today’s distributed work environment, understanding the geographic origin of network traffic has become more crucial than ever. As organizations adapt to remote work, IT teams face the challenge of monitoring and analyzing an expanding array of IP addresses from various locations. Graylog’s geolocation feature offers a powerful solution to this challenge, allowing teams to extract and visualize geographic information from IP addresses in their logs.
Why Geolocation Matters
Geolocation data can significantly enhance your log analysis and security investigations. By mapping IP addresses to physical locations, you can:
- Quickly identify unusual traffic patterns
- Detect potential security threats from unexpected locations
- Understand the global distribution of your user base or incoming traffic
- Enhance incident response with geographic context
For instance, if you suddenly see traffic from a country your organization doesn’t typically interact with, it could warrant further investigation.
Setting Up Geolocation in Graylog
Graylog ships with geolocation capabilities, but some configuration is required. Here’s how to set it up:
1. Download the Geolocation Database
As of Graylog version 4.3, both MaxMind and IPInfo databases are supported. For this guide, we’ll use the MaxMind GeoLite2 Database.
Note: Since December 30, 2019, you must create an account and obtain a license key to download MaxMind databases.
2. Store the Database
Place the downloaded database files on all servers running Graylog. Ensure the Graylog user has read permissions for these files.
3. Configure the Geolocation Processor
Navigate to System > Configurations > Message Processors. Ensure that the Illuminate Processor is queued before the GeoIP Resolver.

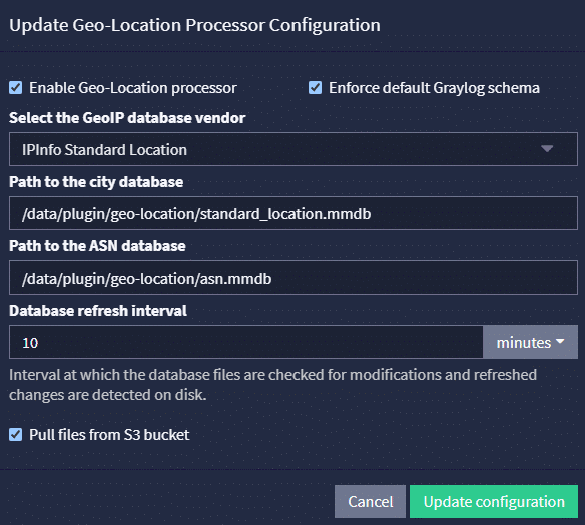
Then, go to Plugins > Geo-Location Processor and click “Edit configuration”. Enable the Geo-location processor and enter the paths to your city and ASN databases.

4. Configure Schema Enforcement (Optional)
Graylog offers a schema enforcement option for geolocation processing:
- If disabled: All non-reserved IP fields will be processed with added geolocation fields.
- If enabled: Only specific GIM schema fields (e.g., source_ip, destination_ip) will be processed, providing standardized geolocation enrichment.
Visualizing Geolocation Data
Graylog offers powerful visualization capabilities for geolocation data:
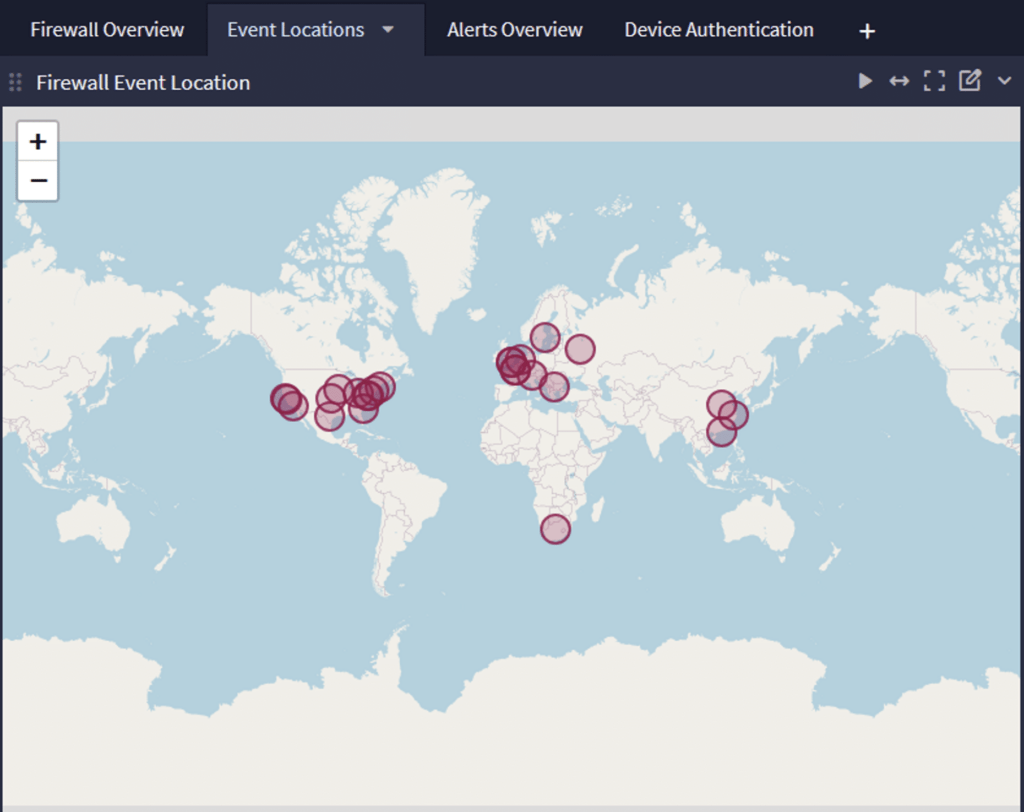
- Create an aggregation widget on the search results page and select “World Map” as the Visualization Type.
- You can add metrics to affect the size of the dots on the map, providing additional context to your visualization.
- Export your map visualization to a dashboard for easy access and monitoring.

Advanced Feature: S3 Integration
Graylog 4.3 introduces the ability to store geolocation database files in AWS S3 buckets:
- Enable the “Pull files from S3 bucket” option in the Geo-Location Processor configuration.
- Provide S3 bucket URLs for your geolocation database files.
- Graylog will periodically check for updates and download new files as needed.
This feature allows for more accessible updates and management across multiple Graylog nodes.
Conclusion
Geolocation in Graylog is a powerful tool for enhancing log analysis and security investigations. By following these steps, you can gain valuable geographic insights from your log data, helping you quickly identify unusual patterns and potential security threats. As remote work continues to be a significant part of many organizations, understanding the geographic context of your network traffic is more important than ever.
Remember to regularly update your geolocation databases to ensure accuracy, and consider leveraging Graylog’s dashboard features to keep your geographic insights readily accessible to your team.


